Wednesday, July 29, 2015

Flood

My Aunt and Uncle came home, one day, to their home in ruins.  Apparently, while they were gone a pipe burst in their upstairs bathroom.  With them being gone several days... only 2 bedrooms were free of damage.  Everything else...other bedrooms, kitchen, living room, both bathrooms and basement had water damage.  Floors, ceiling and walls will need to be repaired along with furniture too.  My heart went out to them. The bright side was that no one was hurt and that the home and it's furnishing can be replaced.  Although... with things that were sentimental... sigh.

So, I decided to create a lovely card for them. I did and will send out that card, but my husband suggested that I create this card for them too.  Of Noah and the Ark.... and then the inside with the rainbow and God's promises.

I really like the symbolism in the artwork and words.  Beautiful!  I pray that they receive God's love and His strength to get through this.

Thanks for stopping by!

Supplies Used:
Stamp Set - Two by Two, Hardwood
Paper - Soft Suede, Crushed Curry, Whisper White
Ink - Blendabilities (Crumb Cake, Night of Navy, Daffodil Delight, Pumpkin Pie, Smoky Slate)
Embellishments - MDS (Sprinkles and Sunshine - sun and rainbow)
Font - MDS (KG Eyes Wide Open)


Built for Free Using: My Stampin Blog

Melon Petals

I love the look of the triple time stamping technique.  I've only used it on white cardstock, so I thought I'd try using it on colored cardstock with white embossing.

I first cut my Watermelon Wonder sheet 8.5x5.5 (base), 4.25x3 and 3.25x2. I then stuck them "temporarily" together with a bit of double-sided sticky tape.  Then, I heat embossed white embossing powder on versamark ink all the flowers and the sentiment.  Once that was complete, I carefully removed the layers and matted each "piece" on to white cardstock.

Thanks for taking a look!

Supplies Used:
Stamp Set - Peaceful Petals
Ink - Versamark
Paper - Watermelon Wonder, Whisper White
Accessories - White Embossing Powder, Heat Tool, Organza White Ribbon


Built for Free Using: My Stampin Blog

Thursday, July 16, 2015

Big Banner Day

This card looks so much better in person than in my photo... darn lighting. Lol!  The colors I used are Coastal Cabana, Basic Black and Whisper White.

I colored in the 'birthday' with my Coastal Cabana stampin' write marker.

Now, on to how I made my banner flags.  I used the Sweet Sadie Washi tape on both Coastal Cabana and Whisper White cardstock before punch them with the banner punch.

Thanks for stopping by!

Supplies Used:
Stamp Set - Big Day
Ink - Coastal Cabana, Memento
Paper - Coastal Cabana, Basic Black and Whisper White
Accessories - Ovals Collection Framelits, Stylish Stripes, Big Shot, Banner Punch

Built for Free Using: My Stampin Blog

Wednesday, July 15, 2015

Sunflower Wedding Invitations


I had the opportunity to create wedding invitations for a friend of a friend of my sister-in-law.  My sister-in-law's wedding was the first time I attempted to create wedding invitations, so I was nervous about accepting this order from someone other than family.

The mother-in-law, mother and bride were so easy to talk with as we created something that the bride was excited to hand out.  The top photo is the final version, but wanted to share with you all the versions I came up with (below).  The bride wanted sunflowers on her invitations, so I gave her 3 to choose from:


After choosing the one they liked the best. She wanted a pocket card invitation, so with the photo above you can definitely see the pocket card design. 

I created the pocket card out of 12x12 cardstock. I cut 2" from the bottom. On the Simply Scored Plate - I scored on 2.25" and 7.25".... and I rotated it 90 degrees (counter- clockwise) and scored on 7". With the scoring done, I trimmed the bottom piece to only include the pocket part. 

Here is what the closed invitation looks like:

I'm so happy that they are pleased with the results of all my hard work.
Thanks for looking!

Supplies Used:
Stamp Sets - Flower Patch
Paper - Night of Navy, Delightful Dijon, Crushed Curry
Ink - Delightful Dijon, Chocolate Chip
Accessories - Flower Fair Framelits, Big Shot, Lace Dotted Trim (Delightful Dijon)

I used My Digital Studio to create the inside invitation and response card.
Stamp Set - Noteworthy Labels (by Stampin' Up!)
Embellishments - Very Vanilla Taffeta Ribbon; Country Sunflowers (by Mandog)
Font - Majestic and Corbel (Night of Navy)

Hoppy Birthday


When I saw Lisa's cute card (bottom)... I just knew I had to try to recreate it using what I had.  My card is the top one! =)  I just LOVE how it turned out!

I used my digital software and printed out the frogs and the 'hoppy birthday' sentiment on Whisper White cardstock.

Next it was all about texture and layers.  I used three different Texture Impression Embossing Folders (TIEF) on this project - Square Lattice on the white, Houndstooth on the green, and Decorative Dots on the orange.

Thanks for hopping on over!

Supplies Used:
Embellishment - Hoppy Memories (frogs)
Font - Agency (hoppy - Old Olive); AtLastGreeting (birthday - Pumpkin Pie)

Paper - Old Olive, Pumpkin Pie, Whisper White
Accessories - Big Shot, Houndstooth TIEF, Square Lattice TIEF, Decorative Dots TIEF, Pumpkin Pie taffeta ribbon


Tuesday, July 14, 2015

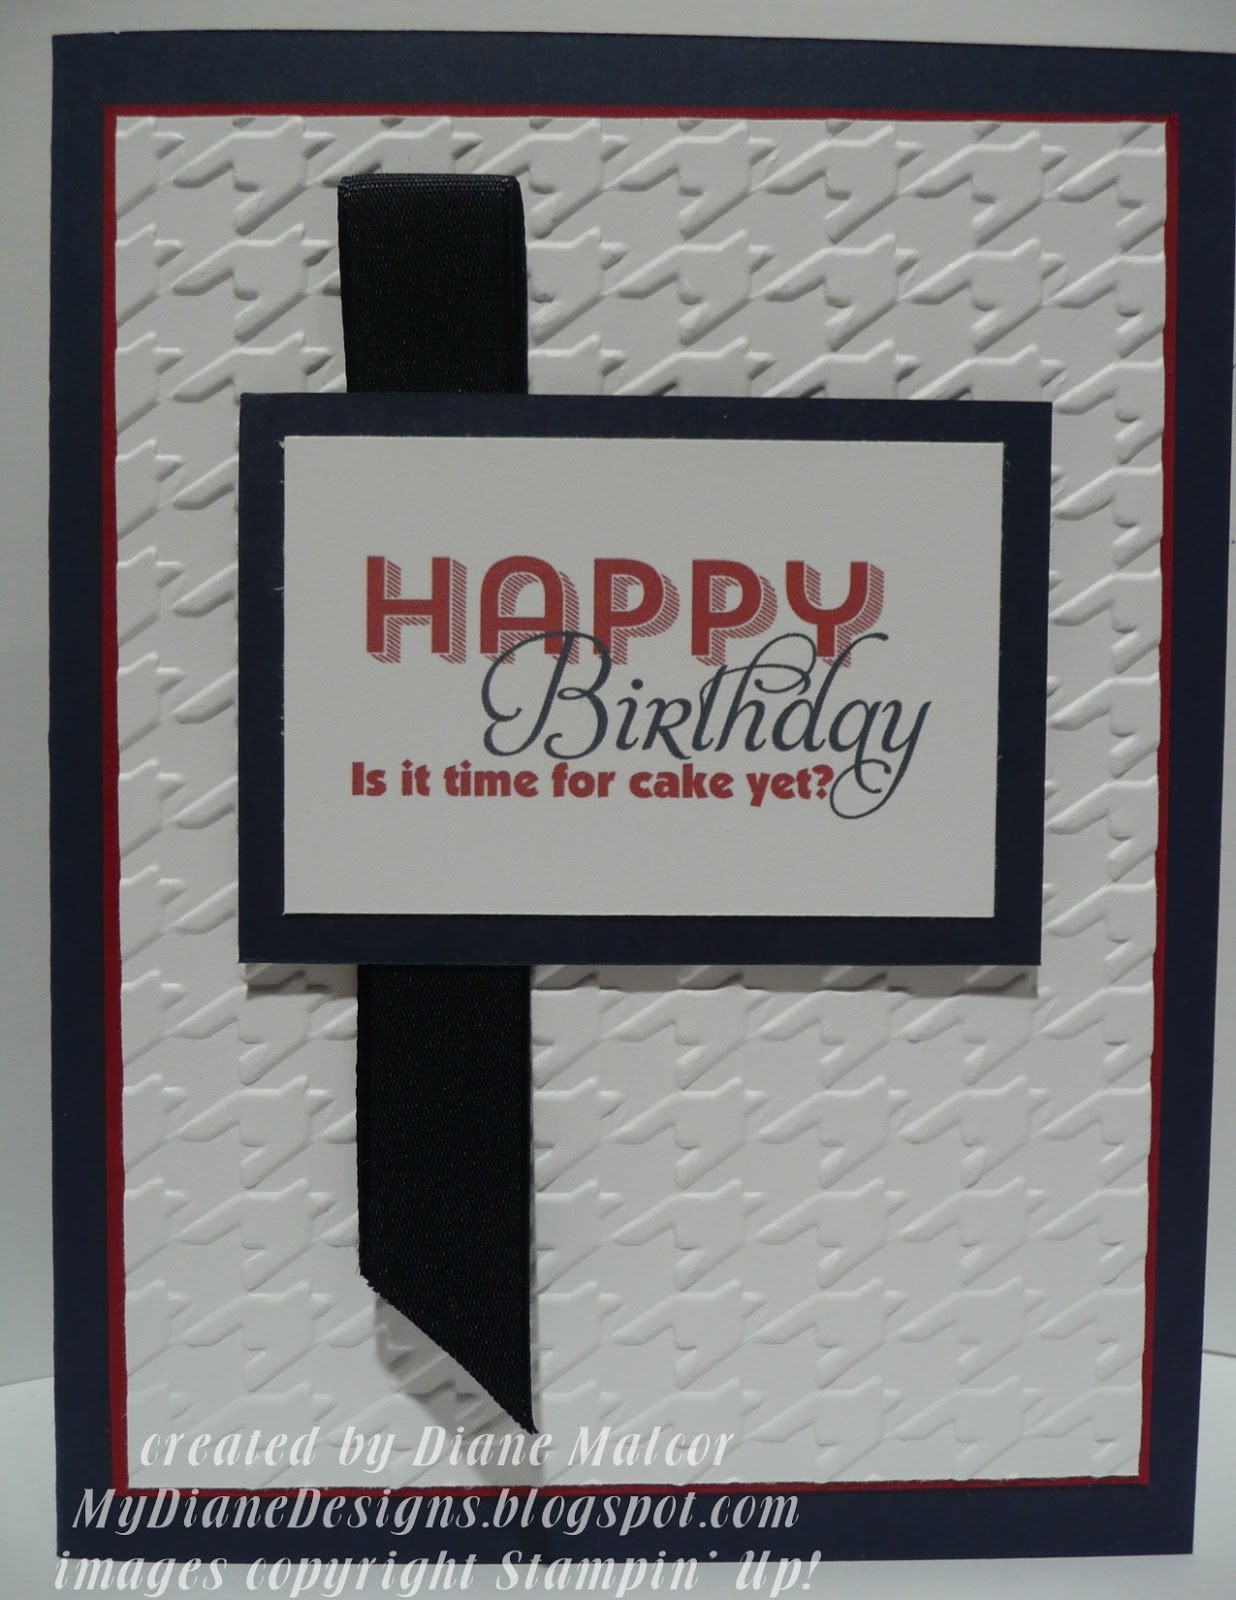
Later Elegance


When I saw Arlene's card (bottom) on Pinterest.... I loved the simplicity of it - plus, it seemed very masculine to me.  I needed to create a card that was for my Godson who is a young adult.  I didn't have any big "Happy" stamps that would work, nor did I have the 'is it time for cake' phrase.  So, I used my digital software for the wording.

The 'Happy' is from the See Ya Later stamp set... I just cropped out what I needed.  I did the same for 'Birthday' as it's from the Elementary Elegance stamp set.  I used the Boulder font to complete the phrase.  Then, I printed it out on Whisper White cardstock and finished the process from there.

Thanks for taking a look!

Supplies Used
Stamp Sets - See Ya Later (happy - Cherry Cobbler), Elementary Elegance (birthday - Night of Navy)
Font - Boulder (Cherry Cobbler)
Paper- Whisper White, Cherry Cobbler, Night of Navy
Accessories - Navy Ribbon (non-SU) , Houndstooth TIEF, Big Shot, Dimensionals


Delightful Petals

The top card is the one I created after seeing the card below on Pinterest. Isn't it lovely?  Thanks Brenna for your inspiration!

Thanks for taking a peek!

Supplies Used:
Stamp Set - Painted Petals
Ink - Black Staz-on, Old Olive, Daffodil Delight, Smoky Slate
Paper - Daffodil Delight, Smoky Slate, Basic Black and Whisper White

Built for Free Using: My Stampin Blog

Monday, July 13, 2015

On The Field

For me, it's a bit difficult to create teen boy cards... especially when those teen boys do not play sports. However, my nephew does love football... and he plays on his high school football team. So, making this card for him was surprisingly easy.

I created the field and the football within My Digital Studio software... and then printed it out on Whisper White cardstock.  For the field, I covered the entire background with Gumball Green. Then, for the yard lines I used a square punch filled w/Whisper White.  I finished off by adding the number punches (Timeless Type Junior Numbers)in Whisper White.

Next, I created the football. It's from the 'Great Sport' digital download and colored it Soft Suede.

Thanks for stopping by!

Supplies Used:
Stamp Brush Set - Great Sport (Soft Suede)
Background - Gumball Green
Punch - Square (filled w/Whisper White); Timeless Type Junior Numbers (Whisper White)
Paper - Whisper White, Soft Suede


Built for Free Using: My Stampin Blog

Tree and Twine


I love looking through pinterest seeing cards that are so lovely... I just need to create one for myself. My card is on the left and Lori McAree (from smilingwhilestamping.blogspot.com) card is on the right.  Thanks Lori for your inspiration!

As you can see, I changed just a few things from what Lori did!

Thanks for stopping by!

Supplies Used:
Stamp Set - Lovely As A Tree
Ink - Black Staz-on
Paper - Crumb Cake
Accessories - hole punch, Black Brads, Simply Scored, Black Twine (non-SU)


Built for Free Using: My Stampin Blog

Fabulous Banner

I LOVE how my card came out!!!!!  It took a bit of time to get my flags all straight and to get the twine behind them, but it was worth the struggle. LOL!
I got inspiration from Dawn Griffith's card. Here's her's:
Thanks Dawn for your wonderful creation!
Thanks for taking a peek!
Supplies Used:
Stamp Set - Fabulous Four
Ink - Black Staz-on
Paper - Pacific Point, Whisper White, Basic Black, Real Red DSP, Pacific Point DSP, Daffodil Delight DSP, Old Olive DSP
Accessories - Banner Punch, Decorative Dots TIEF, Big Shot, Corner Round Punch, Black Twine (non-SU), dimensionals


Built for Free Using: My Stampin Blog

Nuts About You!

Wow! Creating this card was way more difficult than I thought it would be.  I saw Maggie Mata's card on Pinterest, and I thought... that looks so cute-- I'd try my hand at it.
Here's her card:
Now her's still looks so much better than mine with all the sponging around the "nuts". Thanks so much Maggie for your inspiration.

The reason mine took so long and was so difficult for me was because I don't own a circle punch that was the right size for the inside.  I had a 'die-cut' that was the correct circle size, but couldn't use it since other "dies" were too close to it (it would cut into the hexagon punch).  So, I'd like to show you the struggles I took with my other two versions here:
 
Ugh, I cringe when I see these, but they are my first attempts, and wanted to share with you my struggles.  With the one on the left, I used the Flower Frenzy BigzL Die for the small circle inside the hexagon.  It was the correct size, but it didn't give me the feel that their was actually a hole in the "nut". So, back to the drawing board... with the one on the right, I used the circle cutting system (from Creative Memories) to cut out the hole.  Now, it does not show the looks of a "nut", but I have never seen a skinny nut like that.

I was gonna just stop there, then decided to try again... this time just using my digital software.  I feel it doesn't really work too well.  Maggie's is so much better! But I did try!  I hope my hubby loves it!

Thanks for letting me show you my struggling process! LOL!

Supplies Used:
Font - Cuckoo and CK Cutie (Real Red)

Paper - Sahara Sand, Whisper White, Basic Black, Cherry Cobbler
Accessories - Hexagon Punch, Flower Frenzy BigZL Die, Circle Cutting System (CM), Solid Stripes TIEF, Big Shot, dimensionals

Friday, July 10, 2015

Family Reunion Invite

My Mom's side of the family decided to finally have a family reunion this year.  I volunteered to create the invitation. Although, many are not able to make the reunion... I'm sure we will enjoy time spent with other family members that are there. Next time we have it -- we will definitely allow more time for those that are far away to attend.

I created the invitation with my digital software using the Family Spotlight Ensemble.  I loved the tree with it's heart on top! <--- Perfect for our family reunion.  The truck of the tree was one stamp and the leaves and heart another.  I used the coloring tool to change the heart from green to red.

Thanks so much for stopping by!

Supplies Used:
Stamp Brush Set - Family Spotlight (tree, leaves and heart)
Punch - Square (filled w/Garden Green)
Font - Castellar and Bliss (Baked Brown Sugar)

Sorrowful Dreams

It's never a pleasant time to create a sympathy card, and this one was so very difficult to make too.  My friend's brother just passed away... way too young to die.  So sad for her and her family.  May the Lord bring comfort to them and watch over them through this most difficult time.

Thanks so much for looking!

Supplies Used
Stamp sets - World of Dreams, Thoughts and Prayers
Ink - Smoky Slate, Basic Black
Paper - Smoky Slate, Basic Black and Whisper White
Accessories - Apothecary Accents Framelits, Woodgrain TIEF, Big Shot, dimensionals, Satin Ribbon (Basic Black)


Built for Free Using: My Stampin Blog

Green Card

Our friends recently became permanent residents of the USA, and received their "green cards". My husband's funny idea was to send them a green card -- with nothing else on it! LOL!  Luckily for us our friends will get Mike's humor.

I did dress-up the inside of the card, so it's not so plain.

Thanks for taking a peek!

Supplies Used:
Paper - Garden Green

Thursday, June 25, 2015

Something to Dream

I needed a small 'thank you' card for my brother.  This card measures 3.5x 4.5.

I sometimes struggle creating masculine cards, but with this one -- I was pleasantly surprised.  I knew I wanted to use the 'World of Dreams' stamp set -- with it's leaves stamp, and when I paired it with the 'Sweet Dreams' washi tape.... it all came together quickly.  Gotta love washi tape... it just adds so much, but it's so easy to use.

I wanted to keep it simple, so I just used Lost Lagoon to ink the leaves and sentiment.

Thanks for stopping by!

Supplies Used
Stamp Set - World of Dreams, Something to Say
Ink - Lost Lagoon
Paper - Whisper White
Accessories - Washi Tape (Sweet Dreams)


Built for Free Using: My Stampin Blog

Wednesday, June 24, 2015

Coast - DGPROG15JUN


The Splitcoaststampers website hosts a Progressive Scrapbook Challenge each month.  Each week several tasks are added, so that at the end of the month... you have a completed page.

Here are the links to each task on the Splitcoaststampers website:

I completed my page in my new My Memories Suite digital software to test it out.  The My Digital Studio (from Stampin' Up!) is no longer being supported, so I need to try other programs.  My Memories Suite is very similar to MDS... with a few differences, so it provides an almost seamless transition for those that love My Digital Studio.

I have noticed that you cannot crop stamps (or imprints, as they are called in MMS) as you could do in MDS.  I will need to contact My Memories Suite developers to see if this can be added to their software.

For this progressive challenge, I used photos from March 2015 when we took my brother to the coast to see the Pacific Ocean.  It was a bit chilly, but fun to walk and take photos on the beach.  There were many, many steps to go down (and then back up), but we did it! =)

Thanks for stopping by!

Supplies Used:
Stamp Brush Set - Anchors Away (wave - light blue - Stampin' Up!); Vintage Overlays (Brown - Stampin' Up!); Splatter (Brown - Stampin' Up!)
Punch - Square (Summer Vacation DSP - Lindsay Jane and brown); Tasteful Trim (Brown and Yellow)
Font - Beach (yellow); CK Teen (Brown)

Monday, June 22, 2015

Sunflower Thanks

I created this thank you card to 1) Coordinate with the wedding invitations I created and 2) So that it could fit my invoice/bill.  The card measurements are 4x8.5.

Thanks for stopping by!

Supplies Used:
Stamp Sets - Flower Patch, Fabulous Four
Paper - Night of Navy, Whisper White, Crushed Curry, Delightful Dijon, Chocolate Chip
Ink - Chocolate Chip, Crushed Curry
Accessories - Dotted Lace Trim (Delightful Dijon), Flower Fair Framelits, Big Shot, Glue dots


Built for Free Using: My Stampin Blog

Pictogram Sayings

I wanted to use some new in-colors from the new Stampin' Up! catalog... here I'm using the new Watermelon Wonder and Cucumber Crush.

Thanks for looking!

Supplies Used:
Stamp Sets - Pictogram Punches, Something to Say
Ink - Watermelon Wonder, Cucumber Crush, Black Staz-on
Paper - Watermelon Wonder, Whisper White, Basic Black DSP
Accessories - Basic Rhinestones, glue dots, Itty Bitty Accents Punch


Built for Free Using: My Stampin Blog

Perfect Print Wishes

My nephew is turning 16!!!  I found inspiration -- where else? -- on Pinterest, of course! LOL! I saw Tanya Bells card and wanted to create one of my own. Thanks so much Tanya... I love your red card!
Here is her card:
Thanks for stopping by!

Supplies Used:
Stamp Set - Endless Birthday Wishes
Ink - Black Staz-on
Paper - Lost Lagoon, Whisper White, Basic Black, Lost Lagoon DSP
Accessories - Lost Lagoon Satin Stitched Ribbon, Perfect Print Numbers Bigz Die, Stylish Stripes TIEF, Big Shot, Circle Punch


Built for Free Using: My Stampin Blog

Timeless Cat

I loved the idea of using DSP in alphabet punches. As I do not own alphabet punches or dies.... I tried to think of a way to make it happen.

LIGHTBULB!!!! I can use my digital software to do this!!!! duh! LOL!

I placed the Timeless Type letters 'Happy' on a page. Next, I spaced them evenly horizontally and made them even according to the bottom of each letter. They were too huge to begin with, so instead of sizing them individually.... I grouped them together, then sized it to the height I wanted them to be. Then, I ungrouped them and inserted striped DSP in each letter.

I added 'Father's Day' in a text box underneath in Bodoni font. BUT, I felt that it was missing something.  As this card was for my Father-in-law... I chose a kitty since he has a grey cat at home.

Thanks for taking a peek!

Supplies Used:
Punch - Timeless Type Alphabet (filled w/Night of Navy and Marina Mist DSP)
Stamp Brush Set - Cute Cats (Smoky Slate)
Font - Bodoni (Night of Navy)
Paper - Night of Navy, Smoky Slate and Whisper White

Built for Free Using: My Stampin Blog

Complimentary Nuts


I saw a similar card in Target, and thought this would be perfect for my Dad for Father's Day... as he enjoys eating nuts.
Here is the card I saw at Target:
I found a peanut clip art on the interent, and downloaded it to my computer. Then I opened up My Digital Studio to  add the word bubbles and text. After printing it on Whisper White cardstock, and adhering it to Black then Crumb cardstock.... I added the googly eyes! I drew in mouths with my Black stampin' write markers. So Adorable!

The inside of the card reads: "Thought you'd like some 'complimentary nuts' to celebrate Father's Day."

Thanks for stopping by!

Supplies Used:
Stamp Brush Set - Hello There (word bubble - Basic Black)
Font - Broach (Basic Black)
Paper - Crumb Cake, Basic Black, Whisper White
Ink - Basic Black
Accessories - Peanut clip art, googly eyes, two way glue

Built for Free Using: My Stampin Blog

Thursday, June 18, 2015

Some Fair Blossom


As you may have guessed, I do find a lot of inspiration in other blogs and forums. This card was no different. I was so taken with LeAnne Pugliese's tulips -- the color and how she did her tulips... that I had to try this out for myself with the tools I had on hand.

I used one of the framelits within the Flower Fair set for my flower.  I took my card in a totally different direction with my layout on my card, but I want you to see her's, so you can see where I do get inspiration.  Thanks LeAnne!
Here is her card:

Thanks for taking a look!

Supplies Used:
Stamp Sets - Something to Say, Lotus Blossom
Ink - Old Olive, Tangelo Twist
Paper - Tangelo Twist, Old Olive, Whisper White, Tangelo Twist DSP
Accessories - Big Shot, Flower Fair Framelits, sponge dauber, corner round punch, Old Olive Striped Organdy Ribbon, Whisper White Twine


Built for Free Using: My Stampin Blog

Stylish Grad


I find inspiration from many places and this card was no different.  I saw the card on the right and loved the saying.

I decided to design something in My Digital Studio around that saying.  I used the cap from 'Go Graduate Plus'.

Thanks for looking!

Supplies Used:
Stamp Brush Set - Go Graduate Plus (cap - Sahara Sand)
Font - Jasmine and Informal (Basic Black)
Paper - Whisper White, Sahara Sand, Night of Navy
Accessories - Stylish Stripes TIEF, Big Shot, Apothecary Framelits, Basic Black Satin Ribbon


Built for Free Using: My Stampin Blog

2015 Grad


I saw this cute graduation card (the one on the right) on Pinterest... it's from Pamela Ho.  I wanted to use the colors of my nephew's school -- which are blue/white/black... but I see the photo doesn't really distinguish too well what's black and what's blue.

I designed most of this in My Digital Studio and printed it off on Whisper White cardstock. The caps are from the digital download 'Grad Party' and I cut them out with scissors and added a dimensional to the back to make every other one 'pop' off the card.

Thanks for stopping by!

Supplies Used:
Stamp Brush Set - Grad Party (caps - Night of Navy and Basic Black)
Font - AtlastGreeting (Night of Navy)
Punch - Square (filled w/ Basic Black for the lines through the date)
Paper - Night of Navy, Basic Black, Whisper White
Accessories - scissors, dimensionals


Built for Free Using: My Stampin Blog

Tuesday, June 9, 2015

Something to Design - HSSCC209

I created this card using the Color Challenge on the Hand Stamped Sentiments Blog (HSSCC209). You may view the challenge here:

I wouldn't have thought to place Mossy Meadow with Bermuda Bay and Calypso Coral... as I think the green is not a "beachy" color as is the other two.  BUT... what do I know.... this color combo is fantastic together! (if I do say so myself)

For the leaves, I used the Flower Frenzy Bigz L Die. I snipped each leaf and then adhered it to a flower before placing it on the card face.

Thanks for stopping by!
Supplies Used:
Stamp Sets - Something to Say
Ink - Chocolate Chip
Paper - Calypso Coral, Mossy Meadow, Bermuda Bay and Whisper White
Accessories - Big Shot, Designer Frames TIEF, Itty Bitty Accents Punch, Basic Pearls, Corner Round Punch

Built for Free Using: My Stampin Blog

Tuesday, June 2, 2015

Rustic - VSBN15May


I created this page using the progressive challenge throughout the month of May (each week several tasks are given, so that at the end of the month... you have a completed page.  The progressive challenges are found on the SplitCoastStampers website.  You may view the steps in each of these links:

I love how this challenge asked us to only use two colors (along with a neutral color) to create our page.
Thanks for taking a peek!

Here is what I used on my page:
Background - Juntos DSP #1
Embellishments - Stitching (Chocolate Chip recolored to match the blue); Feast of Thanks (leaf recolored Midnight Muse); Baker's Twine (bow recolored Midnight Muse)
Stamp Brush Set - Bloomin' Marvelous (leaf - Mellow Moss)
Punch - Square (filled w/Juntos DSP#1 with a Midnight Muse mat, Juntos DSP #7, Midnight Muse DSP, Mellow Moss and Very Vanilla)
Font - Pickwick (Midnight Muse); Script MT Bold (Midnight Muse and Mellow Moss)

Monday, June 1, 2015

College Grad


I saw Dawn's (DawnsGreetingCards on Etsy website) lovely card (her's is on the right), and wanted to create something similar with what I had on hand.
I used My Digital Studio to print out the sentiment and cap. Then, I printed it on Whisper White cardstock.
I used the Labels Collection Framelits to cut the sentiment out and scissors to cut out the cap.

I created another one in red, as I was mistaken about the college colors (that would have been so embarrassing!). LOL
Here's the card:


Thanks for looking!

Supplies Used:
Stamp Brush Set - Go Graduate Plus (cap - Night of Navy)
Font - Adorable and Aparajita (Night of Navy)
Paper - Night of Navy, Night of Navy DSP, Whisper White
Accessories - Labels Collection Framelits, Big Shot, Corner Punch, scissors, White Satin Ribbon, dimesionals


Built for Free Using: My Stampin Blog

Endless Flowers

I've found A LOT of inspiration online, and this time was no different.  I saw Bonnie Schmitz' card and loved the simplicity in it's design.  I wanted to create something similar with the punches, stamps and DSP that I had on hand. Thanks so very much Bonnie!

Here is Bonnie Schmitz' lovely card:

Thanks for stopping by!

Supplies Used:
Stamp Set - Endless Birthday Wishes
Paper - Pear Pizzazz, Whisper White, Daffodil Delight DSP, Melon Mambo DSP, Pumpkin Pie DSP
Accessories - Flower Fair Framelits, Big Shot, Basic Pearls, glue dots, Square Punch (non- SU)


Built for Free Using: My Stampin Blog