Showing posts with label Glimmer Kit. Show all posts

Monday, May 30, 2022

Memorial Thanks


In honor of Memorial Day, and my brother and his wife hosting our Memorial Day celebration... I needed to get a card for them.
I designed it within My Memories Suite digital software. I used a heart shape and filled the top in with 'Pursuit of Happiness' (blue stars) and the bottom half with 'Let Freedom Ring' (stripes). The banner is from the 'Glimmer Kit' (Banner). The sentiment is from 'From All You Do' set.

Thanks for stopping by!
Happy Memorial Day!

Supplies Used:
My Memories Suite digital software
Punch - Heart (filled w/Pursuit of Happiness - stars - QueenB), Heart (filled w/Let Freedom Ring - stripes - SU)
Stamp Brush Sets - For All You Do (words - SU); Glimmer Kit (banner- SU)
Paper - Night of Navy, Real Red, Basic White

Friday, March 6, 2020

Paul's 90th


We have become great friends to our neighbors Barb and Paul Chamberlin. Paul celebrated his 90th birthday in April 2019 with family and friends at a town hall in Litchfield, OH.

Thanks for stopping by!

Supplies Used:
My Memories Suite digital software
Background - yellow
Embellishments - MM8 Embellishments (scatter - MyMem)
Stamp Brush Set - Glimmer Kit (banner - SU); Banner Blast (star-SU)
Fonts - Bazooka (white) and Bobo (black)

Friday, December 27, 2019

Christmas Cards 2019


I designed our 2019 Christmas Cards using my digital software, and then having them printed through MPix. The pictures are of us throughout 2019.

Thanks for taking a look!

Supplies Used:
My Memories Suite digital software
Background - ConGRADulations 
Embellishments - Holiday Hustle (leafs - jadyday); 2018 Dec Blog Train (border lights - LAImel); Glimmer Kit (gold line - SU); Designer Rosettes (SU); Christmas Memories (poinsettia -snicker); MM9 Holidays (poinsettia - MyMem)
Font - Dragon (green), Castellar (red)

Thursday, February 8, 2018

Christmas 2017


We celebrated Christmas 2017 on Christmas Eve with the whole Schwab Family. It was great seeing everyone together again. We ate ate, opened presents and played a few games before going to Christmas Eve Mass. A wonderful day!
And with this post.... I've finished my 2017 photobook! Yay!

Thanks for sharing in our memories this year!

Supplies Used:
My Memories Suite
Background - Blog Train December 2015 (Clopez)
Embellishments - Glimmer Kit (gold trim - SU); Blog Train December 2015 (poinsettia - Clopez)
Font - At Last Greeting (white); Britannic Bold (white)


Friday, May 19, 2017

Gingerbread Houses


Continuing work on our 2016 scrapbook.... I can see the end in sight. Only a few more pages to complete 2016. Then, I can work on this year's scrapbook! 

We had the opportunity to help out my nieces and nephew with their gingerbread houses. Well, when I say help... we just watched, as they were great in designing their own houses. So, no photos of Mike and I in these photos... just our nieces and nephew.

Thanks for stopping by!

Supplies Used:
Background - Christmas Dec 2016 Blog Train (marieh) - gingerbread
Punch - Square (filled w/brown)
Stamp Brush Set - Glimmer Kit (SU) - white striped overlay
Embellishments - Everyday Moments (MyMem) - red ricrac; Candy Claus (Kathryn) - jawbreakers; Sugar & Spice (Stina) - gingerbread; Christmas Dec 2016 Blog Train (marieh) - gingerboy
Font - Cuckoo (red); Viner Hand ITC (black and red)

Tuesday, May 16, 2017

Graduation


While we were in Cleveland in June 2016, our nephew graduated from high school. His party was held at the Hinckley Lake Pavilion. We enjoyed great food and fun games with family and friends. Also, 2016 was the year of the cicadas -- they emerge every 17 years to breed and then die after leaving the eggs in the ground. Their song (or noise) can be heard constantly throughout the day/night. Hearing them wasn't so bad...it was actually kinda nice. It was the dead carcasses everywhere that was kinda gross. 

Thanks for taking a look!

Supplies Used:
Background - Black
Punch - Square (filled w/blue)
Embellishments - Glimmer Kit (SU) - gold line; Graduation Day - word congrats
Stamp Brush Sets - Decorative Overlays (SU) white starburst; Go Graduate Plus (SU) - hat and owl; Extreme Elements (SU) - white stars
Font - Wide Latin (white)

Wednesday, September 30, 2015

Iris Gardens


Okay, one more... and I'll be done posting for today.  Here is a double-page spread of our trip to the Schneider Iris Gardens in May 2015.  I think I'm finished with May activities for our 2015 photobook now! Yay!  Still.... no caught up, but I'm not as far behind as I was 2 years ago! Ha!

Thanks for taking a look!

Supplies Used:
Background - gray
Stamp Brush Sets - Twitterpated (chicken wire background - gray); Earth Laugh's (flower - gray); Glimmer Kit (banner - gray); Banner Blast (flower - vanilla)
Punch - Square (filled w/Vanilla)
Embellishment - Pearls (recolored yellow)
Font - Lover's Quarrel and Duchess (black)

Monday, May 18, 2015

Iris Gardens - MDSM114

 
Cindy has a lovely sketch on MDS Monday this week. You may view the challenge on the MDS Monday Blog here: http://mdsmonday.blogspot.com/2015/05/mdsm-114-amazing-ride.html

Since we just went to the Schreiner's Iris Gardens in Salem, OR... It was great to get our photos scrapped.  Although, I will need more pages... as there were so many different varieties and colors of Irises.  Such a beautiful display!

I wanted to let my photos speak more than the page details, so I choice neutral colors - Sahara Sand and Very Vanilla.

Thanks for stopping by!
Supplies Used:
Background - Sahara Sand
Punch - Square (filled w/Very Vanilla)
Stamp Brush Set - Twitterpated (Honeycomb - Sahara Sand); Earth Laughs (flower - Sahara Sand); Glimmer Kit (banner - Sahara Sand); Banner Blast (small flower - Whisper White); All Time Fav (dots - cropped Basic Black) 
Embellishments - Basic Pearls (recolored More Mustard)
Font - Lover's Quarrel and Freehand 951 (Basic Black)


Built for Free Using: My Stampin Blog

Tuesday, March 24, 2015

Happy Ladder Day

LOL! My brother needed a card for his boss, and he wanted to incorporate the ladder safety warning image on it.  I told him that I would be happy to come up with something for him.

As it turns out, March 24th is actually "Ladder Day".  Here's what I found in the 'Urban Dictionary' :

Ladder Day is a non-denominational holiday that falls on the 24th day of March. It is celebrated in the United States, with origins traced back to the southern hamlets of Rockland County, New York. Celebrators of all religions and walks of life gather to share in the joy that is Ladder day, usually by consuming large volumes of champagne and orange juice. This holiday is the first of the spring season, and is an opportunity for patrons to lift their spirits in anticipation of warmer weather and the end of winter.
I created this in My Digital Studio, and printed it on Naturals White Cardstock.
Supplies Used:
Punch - Square (filled w/Summer Sun)
Embellishments - Glimmer Kit (frame recolored Basic Black); OSHA Ladder Safety Warning Label (from the internet)
Font - Arial Bold (Basic Black)
Built for Free Using: My Stampin Blog

Friday, March 13, 2015

Sammamish River

I believe this is the first time I didn't create a double-page spread that had coordinating pages! (This page will be next to my previous post.  I hope they won't look too different next to each other when printed.  I only had this one photo taken in July, and wanted to include it in our 2014 photobook.

I was inspired by a layout on the Sweet Shoppe blog, but I believe I changed it way too much to be considered actually using it.  I'll show it here anyway, and you can determine if I did or not. LOL!

If you can imagine it.... I sort of used the bottom layout! =)

Thanks for taking a peek!

Supplies Used:
Background - Very Vanilla Textured Cardstock
Embellishments - Stitched Grosgrain Ribbon (Cherry Cobbler cropped); Glimmer Kit (frame, scallop trim, dot trim, heart)
Stamp Brush Sets - Vintage Overlays #8 (Basic Black)
Punches - Square (filled w/Cherry Cobbler, Grad Party #7, Blueberry Crisp #1)
Font - Lavanderia and Informal (Very Vanilla)


Built for Free Using: My Stampin Blog

Thursday, February 26, 2015

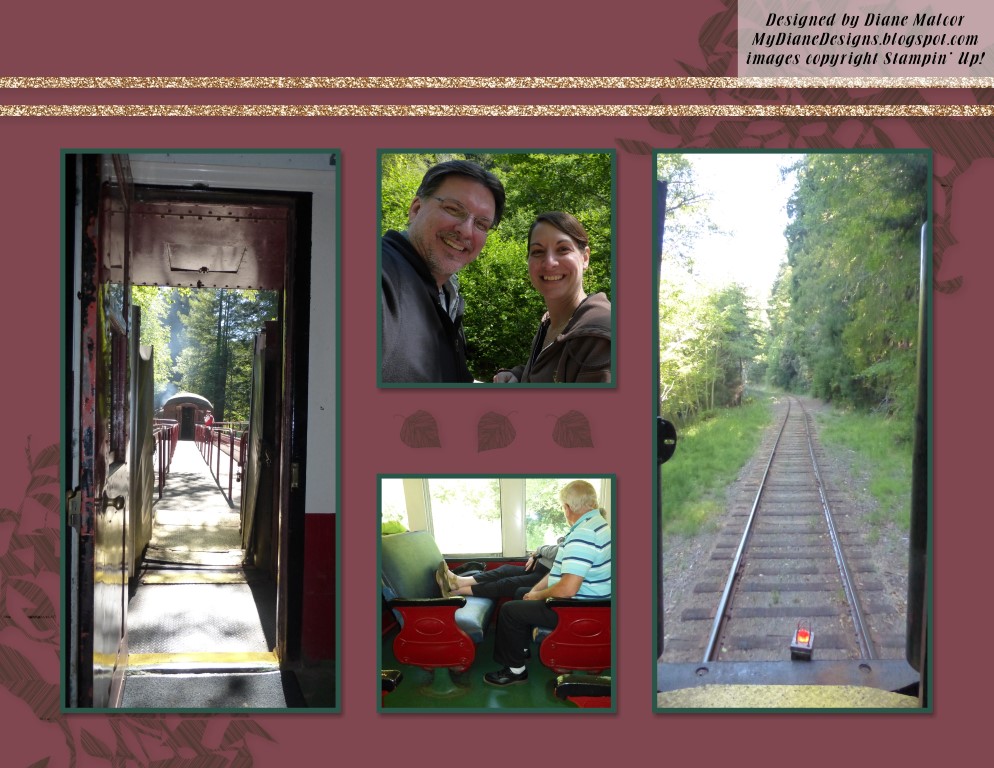
Skunk Train - Part 1


Continuing our 2014 photobook with our trip to northern California with Mike's parents.  We took another scenic train in Fort Bragg and stopped in Northspur to have lunch (see next post).
Thanks for looking!

Supplies Used:
Background - Bravo Burgundy
Embellishments - Glimmer Kit (trim); Spring to Life (tree)
Stamp Brush Sets - Spring to Life (leaf - Early Espresso); Copyright (swirl - cropped More Mustard)
Font - Vagabond (More Mustard)

Built for Free Using: My Stampin Blog

Wednesday, September 24, 2014

Tulips - MDSM83


The MDS Monday has another sketch challenge -- along with a Technique Challenge this week (MDSM83).  This one incorporates "texting on a path" using the freeform tool.  You may view the challenge, all the pages created with the challenge AND videos on how to create a text on a path here:

I had a bit of trouble with my text on the corners -- the text overlapped where it had the 90 degree turn -- but I was able to place some spaces in to get the words to lay as I wanted them to. =)

I used the Watercolor Winter DSP behind the photos, but felt that the original color was just a bit too dark for what I wanted.  So, placing the DSP inside a photo box, I was able to re-color it a different shade of blue -- thus making it softer than the original color. Yay!

This page was from our trip to the Skagit Valley Tulip Festival in April 2014.  Since moving here (12 years ago), we had always wanted to see the many tulip fields.  It was so amazing to see all the many different varieties and the colors. I {heart} tulips!

Thanks for taking a peek!

Supplies Used:
Background paper - Whisper White
Photo Box - Square (Watercolor Winter DSP #9 - recolored Brocade Blue)
Stamp Brush Set - Glimmer Kit (stripes overlay - Baja Breeze)
Fonts - CK Cutie and KG Eyes Wide Open (Baja Breeze)

Tuesday, September 23, 2014

Schwab Wedding


With these pages.....our 2013 scrapbook is complete!!!!! Yay! I finished it before the end of the year! It feels so wonderful to be "almost" up-to-date!!!!  To think that I could start designing our 2014 scrapbook -- IN 2014 -- is just awesome!!!! LOL!

In December 2013, my little brother got married the Saturday after Christmas.  It was great for us, since we came out for Christmas....we could just extend our trip to be there for the wedding.

In designing the first two pages, I used a sketch I found on the Sweet Shoppe website.  Here is the sketch:


Thanks for stopping by!

Supplies Used (on the first 4 pages):
Background paper - Very Vanilla
Embellishments - Taffeta Ribbon (Real Red); Glimmer Kit (word 'Love' and hearts); Basic Pearls; Designer Rosettes (Real Red)
Stamp Brush Set - Decorative Overlays (More Mustard)
Punch - Square (Very Vanilla); Flag (Glimmer DSP)
Font - Chancellor (More Mustard)

Supplies Used (on the last page):
Background paper - Whisper White
Stamp Brush Sets - Presto Patterns Overlays (Basic Black); Love Story (heart - Basic Black; Basic Gray; words 'You & Me' - Basic Black)
Punch - Square (Basic Gray, Love Impressions recolored Basic Gray); Perfect Pennants (Basic Black)

Thursday, July 17, 2014

Love - MDSM74


I decided to work on a few challenges this week.  On the MDS Monday Blog, they provide a sketch....AND... they provide new techniques to try within your My Digital Studio program.  This one was so much fun to create.  You may view the challenge here: 

They wanted us to try the technique of grouping photo boxes together, but with a twist.  Taking one photo box and off-setting it with all the others AND making all the other photo boxes B/W.  To do this, first create however many photo boxes you'd like in a row (align them up by top and space evenly horizontally), next offset one of the photo boxes, then group all the photo boxes together, finally add your photo. Now, with that said.... there is no way to move the photo around to get it where you need within a photo box, so you may need to make adjustments before placing your photo in.  Now.... to make just your focal panel in color and all the others B/W:  first ungroup the photo boxes, next click each panel that you want to change to B/W and select 'Photo Effect' from the Design Center (right-hand side).... then choose Black and White and 'ok'.

Thanks for taking a peek!

Supplies Used:
Background - Basic Black
Embellishments - Glimmer Kit (chevron, heart, trim, words 'love' - Silver)
Punch - Heart (Basic Black); Square (Basic Gray); Flag (Whisper White)
Stamp Brush Set - Simple Snapshots (words 'the beauty of' - Basic Black) <--Note: I did crop the word 'Life' from this stamp
Font - Formal (Basic Black)


Wednesday, June 11, 2014

Grad Invite

My beautiful niece graduated from high school this year. The photo of her was what she wore on her graduation day....such a beautiful photo.... I didn't want it to just sit on my computer folder.  I decided to play with My Digital Studio software to create a graduation invite.
Here's what I came up with.  Her class colors are purple and gold..... which look great next to her soft green dress that she wore.  I love how this turned out!

Thanks for looking!

Supplies Used: Paper - Blackberry Bliss
Embellishments - Glimmer Kit (Gold Trim)
Punch - Square (filled w/Whisper White at 80% opacity); Timeless Type Junior Numbers (filled w/Glimmer -Gold)
Font - Majestic and Cordial (Basic Black)

Wednesday, May 7, 2014

MDS Baseball Pennant

I wanted to re-create a card that I found on Pinterest.... using My Digital Studio (since I didn't have the punches available in the physical sense).  I printed the baseball out on Whisper White cardstock.

I, then, stamped the sentiment (Cherry Cobbler).... I stamped and cut-out the banner 'a' (Night of Navy) and the star (Daffodil Delight) and added them to my card to finish it.

Thanks for taking a peek!

Supplies Used:
Stamp set - Perfect Pennants
Paper - Night of Navy, Whisper White
Ink - Night of Navy, Cherry Cobbler, Daffodil Delight
Accessories - scissors

MDS - Circle Punch (Whisper White and Night of Navy); Stamp Brush Set (Glimmer Kit - chevron - cropped to show only one - Cherry Cobbler)

Thursday, May 1, 2014

Snowman Fun

Whoo hoo! With this page, I have successfully completed our 2012 Photobook! Whew! One step closer to getting up-to-date in my scrapbooking!  It's such a great feeling to have accomplished it!  Now..... I can't wait to order it, and have it delivered!!!!!!!
Thanks for staying on the journey with me through our 2012 trips and memories.

Supplies Used:
Background - Watercolor Winter DSP #9
Embellishments - Glimmer Kit (silver frame); Rhinestones
Stamp Brush Set - Watercolor Winter (snowflake - Whisper White; word 'wonderland' - Soft Sky)
Punch - Square (filled w/Whisper White and Smoky Slate); Dotted Scallop Ribbon (filled w/Smoky Slate)
Font - Snowcaps (Smoky Slate)

Wednesday, April 30, 2014

2012 Christmas

 
Coming down the home stretch of completing our 2012 Photobook, with our trip to Cleveland for Christmas to see my side of the family!  We always have a great time when we get together! I probably should have made 2 two-page spreads with all the photos I wanted to include, but felt that this was enough. LOL!

Thanks for taking a peek!

Supplies Used:
Background - Textured Cardstock (Always Artichoke)
Embellishments - Watercolor Winter (snowflake recolored Very Vanilla); Glimmer Kit (red banner recolored Raspberry Ripple)
Stamp Brush Set - Watercolor Winter (snowflake border - Very Vanilla); Copyright Stamps (swirl cropped - Very Vanilla)
Punch - Square (filled w/Raspberry Ripple); Square and Flag (filled w/Very Vanilla underneath glimmer banner); Circle (Raspberry Ripple and Very Vanilla underneath snowflake embellishment)
Font - Chancellor (Very Vanilla)

Wednesday, April 23, 2014

LeMay Museum


These two pages came together very quickly..... so happy that our 2012 Photobook is coming together!!!  We took a drive down to the LeMay Automobile Museum. WOW! What a fantastic display of cars -- old and new! This was in August 2012.

In creating this page I wanted to try and capture their logo on my page:

I used the Anchors Away Designer Series Paper and recolored it Black.  Since the rays were off-center....I added two photo boxes, so that the rays looked like it came out from the top-center of the page.

Thanks for taking a look!

Supplies Used:
Background - Basic Black
Stamp Brush Set - Countryside (truck - Smoky Slate)
Punch (Photo Box) - filled w/Anchors Away DSP #4 recolored Basic Black; Modern Label - filled w/Smoky Slate; Decorative Label - filled w/Basic Black
Embellishments - Glimmer Kit (Silver Trim #1 and #2); Brad (Silver)
Font - Bodoni (Smoky Slate)

Wednesday, April 16, 2014

Two for the Price of One - MDSM62

I saw this cool sketch on MDS Monday's blog....and saved that sketch to my computer desktop to work on it this week.  Well, I got the time to create it ..... designed it.... and it looks amazing! So, today I went to add it to the MDS Monday's blog, and found out that I didn't read the whole challenge!  Oh well..... time to create again! LOL.  What's great is now I have two wonderful cards! Thanks MDS Monday!

So, if you'd like to view their challenge MDSM62 - click here: http://mdsmonday.blogspot.com/2014/04/mds62-were-matching.html  I've added the sketch here, so you can see it:

The challenge was to create a card with this sketch - AND - to add a DSP that you like and only use the 'matching tool' within MDS to fill in all the other elements on the card. Whew!  I do have to say that it was challenging to complete this task....since the DSP I chose 'Feast of Thanks' had variations within each small strip....as you can see with the striped paper above and below the 'Happy Birthday' piece.


I this card with the words 'Happy Birthday'.  It's from 'Delightful Dozen' and I cropped it to only get one 'Happy' and one 'Birthday' from it, so they show in a single line and not one on top of the other. After grouping them together, I copied and pasted them in rows.  I then added a square punch with my 'Feast of Thanks' striped DSP. I grouped those strips of DSP plus the sentiment together and rotated all of it -.8 degrees. After ungrouping all the elements, I was able to use the color matching tool within MDS to color in my sentiment.  Each balloon is a separate embellishment from 'Piece of Cake' and I used the color matching tool to change those colors to match.  The brad is bronze, but even that I was able to use the color matching tool to change it to be a red bronze. I also used the color matching tool on the tag outline...and with the freeform tool to create the sprinkles underneath the frosting on the cupcake! 
Thanks for a wonderful challenge Cindy (at MDS Monday)!


Supplies Used:
Paper - Naturals White
Punch - Square (filled w/Feast of Thanks DSP #2); Tag (filled w/yellow - color match and Whisper White)
Embellishment - Brad (Bronze - color matched to Red); Piece of Cake (balloons - cropped and color matched blue and yellow)
Stamp Brush Set - Delightful Dozen (words - cropped and color matched yellow and blue); Party Hearty (cupcake - colored Chocolate Chip and Bashful Blue)
Freeform Tool - to color sprinkles blue underneath the frosting using the color matching tool

Now....here's the first card I created with this sketch:
This reminds me of all those times my Dad was fixing the cars or bikes we had over the years...greasing things up and getting messy!

Thanks for looking!

Supplies Used:
Paper - Sahara Sand, Basic Black and Whisper White
Stamp Brush Set - Teeny Tiny Wishes (sentiment- Whisper White), Glimmer Kit (chevrons - Basic Black); Ink Splatter (Basic Black)
Punch - Square (filled w/Smoky Slate); Cog (filled w/Going Gray and Basic Gray


WHOOHOO!  An update on my entry into the MDS Monday Challenge..... my cards were picked!