Monday, July 13, 2015

Fabulous Banner

I LOVE how my card came out!!!!!  It took a bit of time to get my flags all straight and to get the twine behind them, but it was worth the struggle. LOL!
I got inspiration from Dawn Griffith's card. Here's her's:
Thanks Dawn for your wonderful creation!
Thanks for taking a peek!
Supplies Used:
Stamp Set - Fabulous Four
Ink - Black Staz-on
Paper - Pacific Point, Whisper White, Basic Black, Real Red DSP, Pacific Point DSP, Daffodil Delight DSP, Old Olive DSP
Accessories - Banner Punch, Decorative Dots TIEF, Big Shot, Corner Round Punch, Black Twine (non-SU), dimensionals


Built for Free Using: My Stampin Blog

Nuts About You!

Wow! Creating this card was way more difficult than I thought it would be.  I saw Maggie Mata's card on Pinterest, and I thought... that looks so cute-- I'd try my hand at it.
Here's her card:
Now her's still looks so much better than mine with all the sponging around the "nuts". Thanks so much Maggie for your inspiration.

The reason mine took so long and was so difficult for me was because I don't own a circle punch that was the right size for the inside.  I had a 'die-cut' that was the correct circle size, but couldn't use it since other "dies" were too close to it (it would cut into the hexagon punch).  So, I'd like to show you the struggles I took with my other two versions here:
 
Ugh, I cringe when I see these, but they are my first attempts, and wanted to share with you my struggles.  With the one on the left, I used the Flower Frenzy BigzL Die for the small circle inside the hexagon.  It was the correct size, but it didn't give me the feel that their was actually a hole in the "nut". So, back to the drawing board... with the one on the right, I used the circle cutting system (from Creative Memories) to cut out the hole.  Now, it does not show the looks of a "nut", but I have never seen a skinny nut like that.

I was gonna just stop there, then decided to try again... this time just using my digital software.  I feel it doesn't really work too well.  Maggie's is so much better! But I did try!  I hope my hubby loves it!

Thanks for letting me show you my struggling process! LOL!

Supplies Used:
Font - Cuckoo and CK Cutie (Real Red)

Paper - Sahara Sand, Whisper White, Basic Black, Cherry Cobbler
Accessories - Hexagon Punch, Flower Frenzy BigZL Die, Circle Cutting System (CM), Solid Stripes TIEF, Big Shot, dimensionals

Friday, July 10, 2015

Family Reunion Invite

My Mom's side of the family decided to finally have a family reunion this year.  I volunteered to create the invitation. Although, many are not able to make the reunion... I'm sure we will enjoy time spent with other family members that are there. Next time we have it -- we will definitely allow more time for those that are far away to attend.

I created the invitation with my digital software using the Family Spotlight Ensemble.  I loved the tree with it's heart on top! <--- Perfect for our family reunion.  The truck of the tree was one stamp and the leaves and heart another.  I used the coloring tool to change the heart from green to red.

Thanks so much for stopping by!

Supplies Used:
Stamp Brush Set - Family Spotlight (tree, leaves and heart)
Punch - Square (filled w/Garden Green)
Font - Castellar and Bliss (Baked Brown Sugar)

Sorrowful Dreams

It's never a pleasant time to create a sympathy card, and this one was so very difficult to make too.  My friend's brother just passed away... way too young to die.  So sad for her and her family.  May the Lord bring comfort to them and watch over them through this most difficult time.

Thanks so much for looking!

Supplies Used
Stamp sets - World of Dreams, Thoughts and Prayers
Ink - Smoky Slate, Basic Black
Paper - Smoky Slate, Basic Black and Whisper White
Accessories - Apothecary Accents Framelits, Woodgrain TIEF, Big Shot, dimensionals, Satin Ribbon (Basic Black)


Built for Free Using: My Stampin Blog

Green Card

Our friends recently became permanent residents of the USA, and received their "green cards". My husband's funny idea was to send them a green card -- with nothing else on it! LOL!  Luckily for us our friends will get Mike's humor.

I did dress-up the inside of the card, so it's not so plain.

Thanks for taking a peek!

Supplies Used:
Paper - Garden Green

Thursday, June 25, 2015

Something to Dream

I needed a small 'thank you' card for my brother.  This card measures 3.5x 4.5.

I sometimes struggle creating masculine cards, but with this one -- I was pleasantly surprised.  I knew I wanted to use the 'World of Dreams' stamp set -- with it's leaves stamp, and when I paired it with the 'Sweet Dreams' washi tape.... it all came together quickly.  Gotta love washi tape... it just adds so much, but it's so easy to use.

I wanted to keep it simple, so I just used Lost Lagoon to ink the leaves and sentiment.

Thanks for stopping by!

Supplies Used
Stamp Set - World of Dreams, Something to Say
Ink - Lost Lagoon
Paper - Whisper White
Accessories - Washi Tape (Sweet Dreams)


Built for Free Using: My Stampin Blog

Wednesday, June 24, 2015

Coast - DGPROG15JUN


The Splitcoaststampers website hosts a Progressive Scrapbook Challenge each month.  Each week several tasks are added, so that at the end of the month... you have a completed page.

Here are the links to each task on the Splitcoaststampers website:

I completed my page in my new My Memories Suite digital software to test it out.  The My Digital Studio (from Stampin' Up!) is no longer being supported, so I need to try other programs.  My Memories Suite is very similar to MDS... with a few differences, so it provides an almost seamless transition for those that love My Digital Studio.

I have noticed that you cannot crop stamps (or imprints, as they are called in MMS) as you could do in MDS.  I will need to contact My Memories Suite developers to see if this can be added to their software.

For this progressive challenge, I used photos from March 2015 when we took my brother to the coast to see the Pacific Ocean.  It was a bit chilly, but fun to walk and take photos on the beach.  There were many, many steps to go down (and then back up), but we did it! =)

Thanks for stopping by!

Supplies Used:
Stamp Brush Set - Anchors Away (wave - light blue - Stampin' Up!); Vintage Overlays (Brown - Stampin' Up!); Splatter (Brown - Stampin' Up!)
Punch - Square (Summer Vacation DSP - Lindsay Jane and brown); Tasteful Trim (Brown and Yellow)
Font - Beach (yellow); CK Teen (Brown)

Monday, June 22, 2015

Sunflower Thanks

I created this thank you card to 1) Coordinate with the wedding invitations I created and 2) So that it could fit my invoice/bill.  The card measurements are 4x8.5.

Thanks for stopping by!

Supplies Used:
Stamp Sets - Flower Patch, Fabulous Four
Paper - Night of Navy, Whisper White, Crushed Curry, Delightful Dijon, Chocolate Chip
Ink - Chocolate Chip, Crushed Curry
Accessories - Dotted Lace Trim (Delightful Dijon), Flower Fair Framelits, Big Shot, Glue dots


Built for Free Using: My Stampin Blog

Pictogram Sayings

I wanted to use some new in-colors from the new Stampin' Up! catalog... here I'm using the new Watermelon Wonder and Cucumber Crush.

Thanks for looking!

Supplies Used:
Stamp Sets - Pictogram Punches, Something to Say
Ink - Watermelon Wonder, Cucumber Crush, Black Staz-on
Paper - Watermelon Wonder, Whisper White, Basic Black DSP
Accessories - Basic Rhinestones, glue dots, Itty Bitty Accents Punch


Built for Free Using: My Stampin Blog

Perfect Print Wishes

My nephew is turning 16!!!  I found inspiration -- where else? -- on Pinterest, of course! LOL! I saw Tanya Bells card and wanted to create one of my own. Thanks so much Tanya... I love your red card!
Here is her card:
Thanks for stopping by!

Supplies Used:
Stamp Set - Endless Birthday Wishes
Ink - Black Staz-on
Paper - Lost Lagoon, Whisper White, Basic Black, Lost Lagoon DSP
Accessories - Lost Lagoon Satin Stitched Ribbon, Perfect Print Numbers Bigz Die, Stylish Stripes TIEF, Big Shot, Circle Punch


Built for Free Using: My Stampin Blog

Timeless Cat

I loved the idea of using DSP in alphabet punches. As I do not own alphabet punches or dies.... I tried to think of a way to make it happen.

LIGHTBULB!!!! I can use my digital software to do this!!!! duh! LOL!

I placed the Timeless Type letters 'Happy' on a page. Next, I spaced them evenly horizontally and made them even according to the bottom of each letter. They were too huge to begin with, so instead of sizing them individually.... I grouped them together, then sized it to the height I wanted them to be. Then, I ungrouped them and inserted striped DSP in each letter.

I added 'Father's Day' in a text box underneath in Bodoni font. BUT, I felt that it was missing something.  As this card was for my Father-in-law... I chose a kitty since he has a grey cat at home.

Thanks for taking a peek!

Supplies Used:
Punch - Timeless Type Alphabet (filled w/Night of Navy and Marina Mist DSP)
Stamp Brush Set - Cute Cats (Smoky Slate)
Font - Bodoni (Night of Navy)
Paper - Night of Navy, Smoky Slate and Whisper White

Built for Free Using: My Stampin Blog

Complimentary Nuts


I saw a similar card in Target, and thought this would be perfect for my Dad for Father's Day... as he enjoys eating nuts.
Here is the card I saw at Target:
I found a peanut clip art on the interent, and downloaded it to my computer. Then I opened up My Digital Studio to  add the word bubbles and text. After printing it on Whisper White cardstock, and adhering it to Black then Crumb cardstock.... I added the googly eyes! I drew in mouths with my Black stampin' write markers. So Adorable!

The inside of the card reads: "Thought you'd like some 'complimentary nuts' to celebrate Father's Day."

Thanks for stopping by!

Supplies Used:
Stamp Brush Set - Hello There (word bubble - Basic Black)
Font - Broach (Basic Black)
Paper - Crumb Cake, Basic Black, Whisper White
Ink - Basic Black
Accessories - Peanut clip art, googly eyes, two way glue

Built for Free Using: My Stampin Blog

Thursday, June 18, 2015

Some Fair Blossom


As you may have guessed, I do find a lot of inspiration in other blogs and forums. This card was no different. I was so taken with LeAnne Pugliese's tulips -- the color and how she did her tulips... that I had to try this out for myself with the tools I had on hand.

I used one of the framelits within the Flower Fair set for my flower.  I took my card in a totally different direction with my layout on my card, but I want you to see her's, so you can see where I do get inspiration.  Thanks LeAnne!
Here is her card:

Thanks for taking a look!

Supplies Used:
Stamp Sets - Something to Say, Lotus Blossom
Ink - Old Olive, Tangelo Twist
Paper - Tangelo Twist, Old Olive, Whisper White, Tangelo Twist DSP
Accessories - Big Shot, Flower Fair Framelits, sponge dauber, corner round punch, Old Olive Striped Organdy Ribbon, Whisper White Twine


Built for Free Using: My Stampin Blog

Stylish Grad


I find inspiration from many places and this card was no different.  I saw the card on the right and loved the saying.

I decided to design something in My Digital Studio around that saying.  I used the cap from 'Go Graduate Plus'.

Thanks for looking!

Supplies Used:
Stamp Brush Set - Go Graduate Plus (cap - Sahara Sand)
Font - Jasmine and Informal (Basic Black)
Paper - Whisper White, Sahara Sand, Night of Navy
Accessories - Stylish Stripes TIEF, Big Shot, Apothecary Framelits, Basic Black Satin Ribbon


Built for Free Using: My Stampin Blog

2015 Grad


I saw this cute graduation card (the one on the right) on Pinterest... it's from Pamela Ho.  I wanted to use the colors of my nephew's school -- which are blue/white/black... but I see the photo doesn't really distinguish too well what's black and what's blue.

I designed most of this in My Digital Studio and printed it off on Whisper White cardstock. The caps are from the digital download 'Grad Party' and I cut them out with scissors and added a dimensional to the back to make every other one 'pop' off the card.

Thanks for stopping by!

Supplies Used:
Stamp Brush Set - Grad Party (caps - Night of Navy and Basic Black)
Font - AtlastGreeting (Night of Navy)
Punch - Square (filled w/ Basic Black for the lines through the date)
Paper - Night of Navy, Basic Black, Whisper White
Accessories - scissors, dimensionals


Built for Free Using: My Stampin Blog

Tuesday, June 9, 2015

Something to Design - HSSCC209

I created this card using the Color Challenge on the Hand Stamped Sentiments Blog (HSSCC209). You may view the challenge here:

I wouldn't have thought to place Mossy Meadow with Bermuda Bay and Calypso Coral... as I think the green is not a "beachy" color as is the other two.  BUT... what do I know.... this color combo is fantastic together! (if I do say so myself)

For the leaves, I used the Flower Frenzy Bigz L Die. I snipped each leaf and then adhered it to a flower before placing it on the card face.

Thanks for stopping by!
Supplies Used:
Stamp Sets - Something to Say
Ink - Chocolate Chip
Paper - Calypso Coral, Mossy Meadow, Bermuda Bay and Whisper White
Accessories - Big Shot, Designer Frames TIEF, Itty Bitty Accents Punch, Basic Pearls, Corner Round Punch

Built for Free Using: My Stampin Blog

Tuesday, June 2, 2015

Rustic - VSBN15May


I created this page using the progressive challenge throughout the month of May (each week several tasks are given, so that at the end of the month... you have a completed page.  The progressive challenges are found on the SplitCoastStampers website.  You may view the steps in each of these links:

I love how this challenge asked us to only use two colors (along with a neutral color) to create our page.
Thanks for taking a peek!

Here is what I used on my page:
Background - Juntos DSP #1
Embellishments - Stitching (Chocolate Chip recolored to match the blue); Feast of Thanks (leaf recolored Midnight Muse); Baker's Twine (bow recolored Midnight Muse)
Stamp Brush Set - Bloomin' Marvelous (leaf - Mellow Moss)
Punch - Square (filled w/Juntos DSP#1 with a Midnight Muse mat, Juntos DSP #7, Midnight Muse DSP, Mellow Moss and Very Vanilla)
Font - Pickwick (Midnight Muse); Script MT Bold (Midnight Muse and Mellow Moss)

Monday, June 1, 2015

College Grad


I saw Dawn's (DawnsGreetingCards on Etsy website) lovely card (her's is on the right), and wanted to create something similar with what I had on hand.
I used My Digital Studio to print out the sentiment and cap. Then, I printed it on Whisper White cardstock.
I used the Labels Collection Framelits to cut the sentiment out and scissors to cut out the cap.

I created another one in red, as I was mistaken about the college colors (that would have been so embarrassing!). LOL
Here's the card:


Thanks for looking!

Supplies Used:
Stamp Brush Set - Go Graduate Plus (cap - Night of Navy)
Font - Adorable and Aparajita (Night of Navy)
Paper - Night of Navy, Night of Navy DSP, Whisper White
Accessories - Labels Collection Framelits, Big Shot, Corner Punch, scissors, White Satin Ribbon, dimesionals


Built for Free Using: My Stampin Blog

Endless Flowers

I've found A LOT of inspiration online, and this time was no different.  I saw Bonnie Schmitz' card and loved the simplicity in it's design.  I wanted to create something similar with the punches, stamps and DSP that I had on hand. Thanks so very much Bonnie!

Here is Bonnie Schmitz' lovely card:

Thanks for stopping by!

Supplies Used:
Stamp Set - Endless Birthday Wishes
Paper - Pear Pizzazz, Whisper White, Daffodil Delight DSP, Melon Mambo DSP, Pumpkin Pie DSP
Accessories - Flower Fair Framelits, Big Shot, Basic Pearls, glue dots, Square Punch (non- SU)


Built for Free Using: My Stampin Blog

Wednesday, May 27, 2015

Memorial Park - MDSM115


This week will be the last week to play along with the MDS Monday Blog Challenges. So sad to not have this wonderful blog to go to anymore, as it has inspired me to create so many beautiful pages. Thanks ladies for everything you have done for me!
This last challenge can be found here: 

This challenge wanted us to use our favorite MDS downloads, and to explain why they are our favorite.  Well, I have many favorites... as I have many, many downloads! lol! BUT, I did narrow it down to just one favorite here!  Through the years of creating scrapbooks, I've found that I love the look of my pages when I add overlays.  It's just a simple stamp, but it enhances the page with so much character.  With this page, I chose to use an overlay from the "Decorative Overlays' set.

Thanks so much for stopping by!

Supplies Used:
Stamp Set - Decorative Overlays
Embellishments - Stitching (Whisper White)
Punch - Square (filled w/Night of Navy Textured Cardstock, Whisper White); Star (Whisper White)
Font - Steamer (Whisper White); Pageant (Real Red)


Built for Free Using: My Stampin Blog

Happy Houndstooth

I created this using My Digital Studio software. I added the stamps 'Houndstooth' and 'Teeny Tiny Wishes' and then printed it out on Whisper White cardstock.

After that, I added Lost Lagoon Stitched ribbon and then adhered it to Basic Black cardstock. Then, on Lost Lagoon cardstock.

Thanks for stopping by!\

Supplies Used:
Stamp Brush Set - Houndstooth, Teeny Tiny Wishes
Paper - Lost Lagoon, Basic Black, Whisper White
Accessories - Lost Lagoon Stitched ribbon


Built for Free Using: My Stampin Blog

Sweet Patch

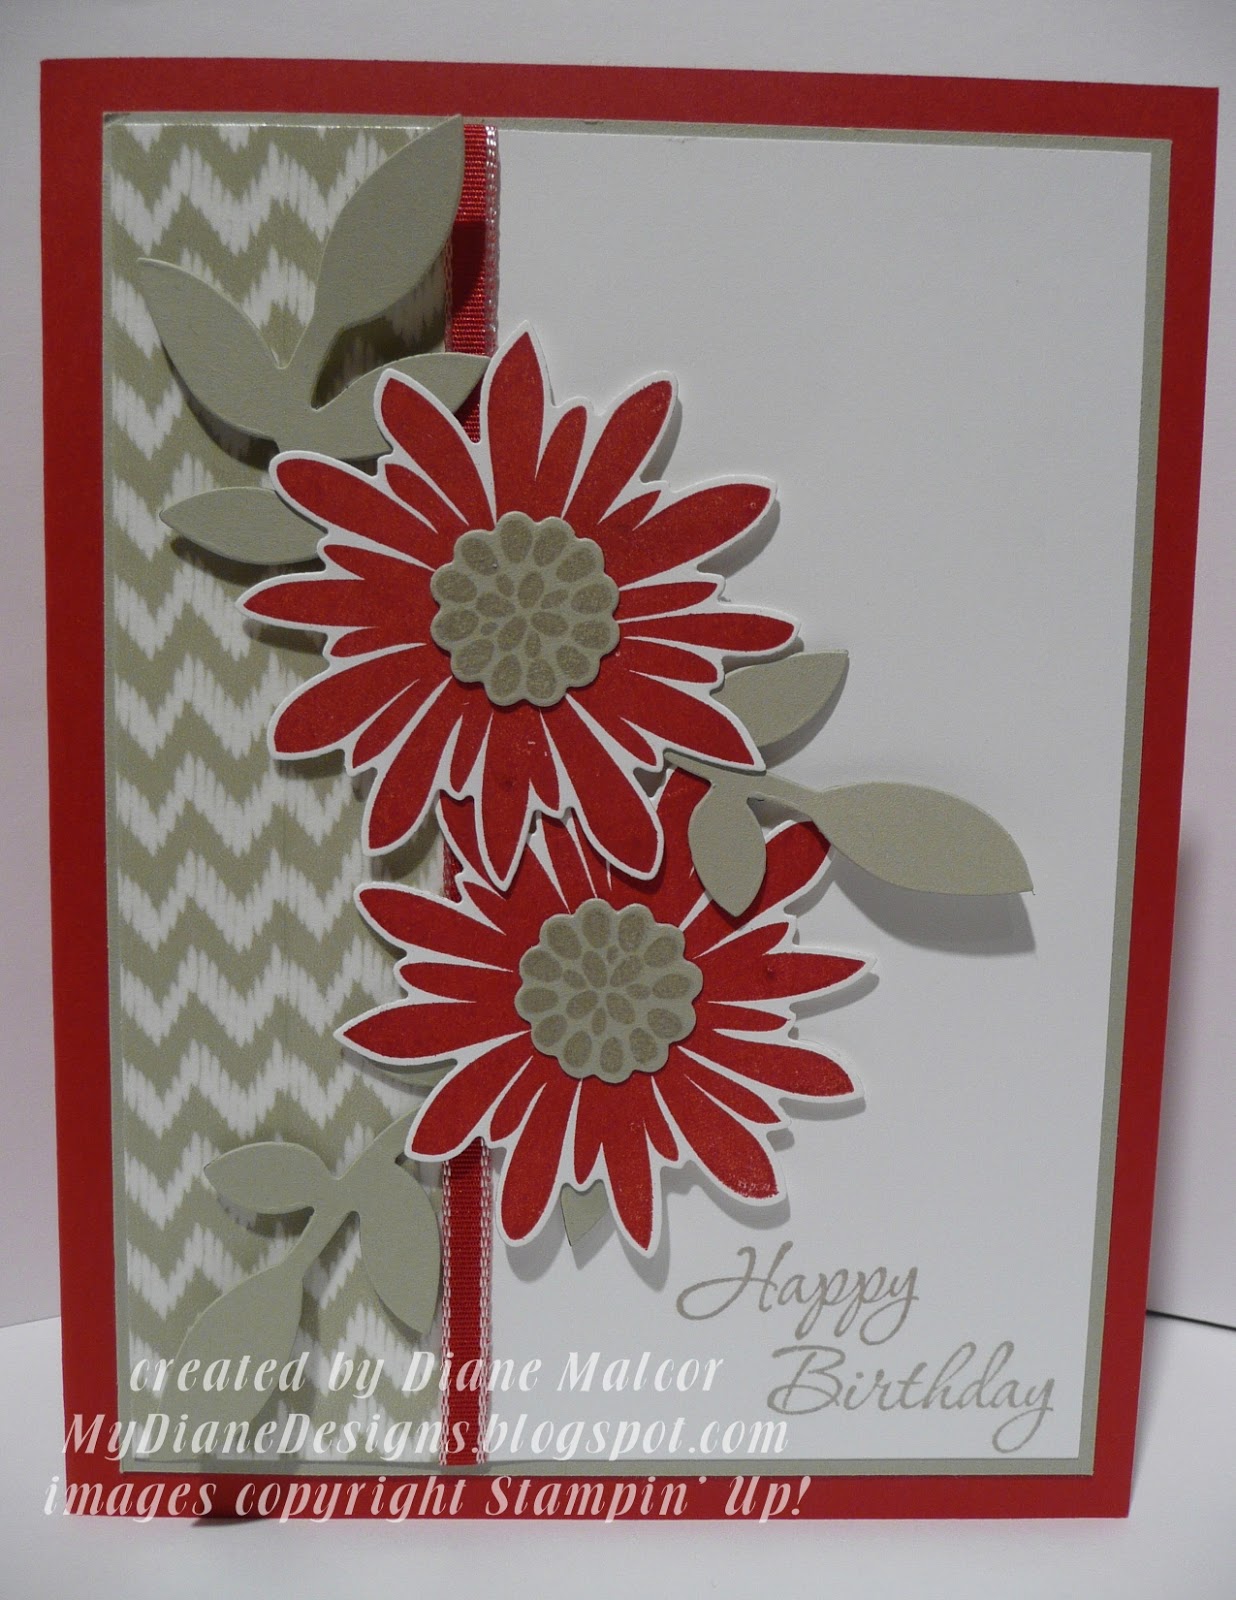
I saw a card using these colors of Red/Gray/White, and wanted to try that color combination on a card too. Wow! Is all I can say! It really makes a stunning card these colors!

I used washi tape on the left-hand side, but placed two columns instead of just one... great effect!

Thanks for looking!

Supplies Used:
Stamp Sets - Memorable Moments, Flower Patch
Ink - Real Red, Sahara Sand
Paper - Real Red, Sahara Sand, Whisper White
Accessories - Big Shot, Flower Frezy Bigz L Die, Flower Fair, Real Red Taffeta Ribbon, stamp-a-ma-jig, Sweet Dreams washi tape, dimensionals


Built for Free Using: My Stampin Blog

Tuesday, May 19, 2015

Bright Essentials

My youngest nephew is turning 5, and so I wanted to incorporate the number in his card.  I saw Michelle Short's card on Pinterest and thought I could create something similar.

Here's her card:
Obviously, her's is for a girl.... so I just changed the cardstock to blue.

Thanks for stopping by!

Supplies Used:
Stamp Sets - You Brighten My Day, Sweet Essentials
Paper - Pool Party, Bermuda Bay, Whisper White
Ink - Bermuda Bay
Accessories - Itty Bitty Accents Punch, Star Punch, Stylish Stripes TIEF, Decorative Dots TIEF, Big Shot, Windows Collection Framelits, Banner Framelits, glue dots


Built for Free Using: My Stampin Blog

Monday, May 18, 2015

Iris Gardens - MDSM114

 
Cindy has a lovely sketch on MDS Monday this week. You may view the challenge on the MDS Monday Blog here: http://mdsmonday.blogspot.com/2015/05/mdsm-114-amazing-ride.html

Since we just went to the Schreiner's Iris Gardens in Salem, OR... It was great to get our photos scrapped.  Although, I will need more pages... as there were so many different varieties and colors of Irises.  Such a beautiful display!

I wanted to let my photos speak more than the page details, so I choice neutral colors - Sahara Sand and Very Vanilla.

Thanks for stopping by!
Supplies Used:
Background - Sahara Sand
Punch - Square (filled w/Very Vanilla)
Stamp Brush Set - Twitterpated (Honeycomb - Sahara Sand); Earth Laughs (flower - Sahara Sand); Glimmer Kit (banner - Sahara Sand); Banner Blast (small flower - Whisper White); All Time Fav (dots - cropped Basic Black) 
Embellishments - Basic Pearls (recolored More Mustard)
Font - Lover's Quarrel and Freehand 951 (Basic Black)


Built for Free Using: My Stampin Blog

Thursday, May 14, 2015

Happy Paradise

I created this with My Digital Studio and printed it on Whisper White Cardstock.

The leaves are from the digital download 'Paradise Found'. I colored them Soft Sky and Pistachio Pudding. The fonts I used are Arial Bold and CK Dandy.

I used a rounded corner punch on two opposite corners before adhering to Pistachio Pudding and then on Soft Sky cardstock.

I added some Old Olive taffeta ribbon to finish the card.

Thanks for taking a peek!

Supplies Used:
Stamp Brush Set - Paradise Found
Paper - Pistachio Pudding, Soft Sky, Whisper White
Accessories - Old Olive taffeta ribbon, glue dot


Built for Free Using: My Stampin Blog

Tuesday, May 12, 2015

Tulips - MDSM113

MDS Monday (Beth) has another wonderful sketch this week.  You may view the sketch and all the pages created with it here:  http://mdsmonday.blogspot.com/2015/05/mdsm-113-visual-interest.html
Beth wanted us to use something other than splatter for the background visual interest.  I chose to use the rain stamp from Everyday Adventure PL kit in Island Indigo and Whisper White.  The white I reduced the opacity so it was a bit translucent on the page.  The title and the criss-cross (or diamond) layer on the green piece are also stamps from the Everyday Adventure PL kit.

I wanted to create a companion page to go with last weeks page I completed for the tulip festival. Since the first page didn't include any tulips.... this page only contains tulips!!

Thanks for looking!

Supplies:
Background - Pool Party
Embellishments - Ruffled Ribbon (Island Indigo); Eyelet (Garden Green)
Stamp Brush Sets - Everyday Adventure PL kit (rain - Island Indigo and Whisper White at 80% opacity; title words - Island Indigo; diamonds background - Whisper White); Our Happy (tulip - Gumball Green, Perfect Plum, Real Red, Summer Sun)
Punches - Square (filled w/Textured Island Indigo, Gumball Green and Whisper White); Tag (Whisper White)
Font - CK Honey


Built for Free Using: My Stampin Blog

Friday, May 8, 2015

Wonderful Flower - FMS183

I have not played with the card sketch challenges in a while, but I do look at them and save them for future use for my cards.  This one from Freshly Made Sketches (FMS183) was posted a few weeks ago, and I'm just now playing with the sketch.  You may view the challenge here along with all the wonderful cards created with it here:

Thanks for stopping by!

Supplies Used:
Stamp sets - Hardwood, Simply Wonderful, Flower Shop
Ink - Soft Suede
Paper - Blushing Bride, Pool Party, Old Olive, Soft Suede and Naturals White
Accessories - Big Shot, Flower Frenzy BigzL Die, Pansy Punch, glue dots


Built for Free Using: My Stampin Blog

Pumpkin Patch

LOL! I was trying to be clever with the title... since I used the 'Flower Patch' stamp set and Pumpkin Pie cardstock! Ha!

For background piece I used the 'Sweet Sadie' washi tape on White cardstock. If you look really closely you can see where I overlapped the tape to lie the pattern correctly down.

Thanks for peeking!

Supplies Used:
Stamp Set - Flower Patch, Mother's Day (non-SU)
Paper - Whisper White, Basic Black, Pumpkin Pie
Ink - Pumpkin Pie, Memento
Accessories - Flower Flair Framelits, Big Shot, Flower Frenzy Bigz L Die, Sweet Sadie washi tape, Pumpkin Pie Taffeta Ribbon, Glue dots

Built for Free Using: My Stampin Blog


Built for Free Using: My Stampin Blog

Many Silhouettes

I saw a card that used this technique.  It's a bit hard to explain, but it was so easy to do.

On Whisper White cardstock, I clear embossed the Serene Silhouettes stamp twice. Then, I sponged the whole background with Soft Sky. (Since it was clear embossed...the white shows through on the Soft Sky background.  With the same stamp, I stamped three times with Island Indigo (full strength ink).  I also stamped twice with Island Indigo, but those were stamped off once on scrap paper before stamping on the card.

I finished it off by stamping the sentiment in Island Indigo.

Thanks for taking a peek!

Supplies Used:
Stamp Sets - Serene Silhouettes, And Many More
Ink - Versamark, Soft Sky, Island Indigo
Paper - Whisper White, Island Indigo
Accessories - Clear Embossing Powder, Heat Tool, sponge daubers


Built for Free Using: My Stampin Blog

Wednesday, May 6, 2015

Loving Silhouettes

Mike and I went on a walk through the neighborhood one day last week (we try to take walks when the weather is so nice in the evenings).  We were stopped by a lovely lady that said she was so very happy to see us holding hands and to never stop loving each other.

As we talked, she mentioned that she had recently lost her husband (two months ago). She reminded us how very much that life can be gone in an instant and to cherish the times we do have.

She touched my heart so much... in my being reminded of losing my Mom a little over a year ago now, that I wanted to express my sorrow for her loss.  Here is the card I created for her.

Thanks for looking!

Supplies Used:
Stamp sets - Loving Thoughts, Serene Silhouettes
Paper - Naturals White, Basic Black, Basic Black DSP
Ink - Black Staz-on, Basic Black
Accessories - Stamp-a-ma-jig


Built for Free Using: My Stampin Blog

Tuesday, May 5, 2015

Envelope of Petals

Hmm... my photo makes the Blackberry Bliss Black. Weird...  so just imagine it's the deep purple color instead of black! LOL!

I've been wanting to try out the envelope on top of a card idea from seeing so many beautiful cards designed that way. I do fear it may be too bulky to mail -- thus having to add more postage than normal. Oh well... I do love the results!

I used a 3.75x3.75 piece of Blackberry bliss and placed the starting punch/score at 2 1/8 on the envelope punch board.

Thanks for taking a peek!

Supplies Used:
Stamp Sets - And Many More, Painted Petals
Ink - Pink Pirouette, So Saffron, Pistachio Pudding
Paper - Blackberry Bliss, Pistachio Pudding, So Saffron, Pink Pirouette, Whisper White
Accessories - Big Shot, Perfect Polka Dots TIEF, Flower Frezy Bigz L Die, Itty Bitty Accents Punch, Stitched Satin Ribbon (Blackberry Bliss), glue dots, Basic Pearls


Built for Free Using: My Stampin Blog

Happy Camper - MDSM112


Anita has a great sketch over at MDS Monday this week MDSM112. Here is the link to the challenge:

She wanted us to focus on just one photo and fill the other boxes with Project Life cards or designer series paper.  I took her advice and filled them with Project Life cards from the 'Happiness Is' kit.

I also took advantage of the sale (30% off) of all the My Digital Studio downloads, and bought the Happy Camper Memories download -- which is featured here.

Thanks for taking a look!

Supplies Used:
Background - Going Gray
Embellishments - Happiness Is Project Life (cards)
Stamp Brush Set - Happy Camper Memories (boots, title - Early Espresso and words - Elegant Eggplant); Splatter - Soft Suede
Font - Comic Sans (Early Espresso)


Built for Free Using: My Stampin Blog